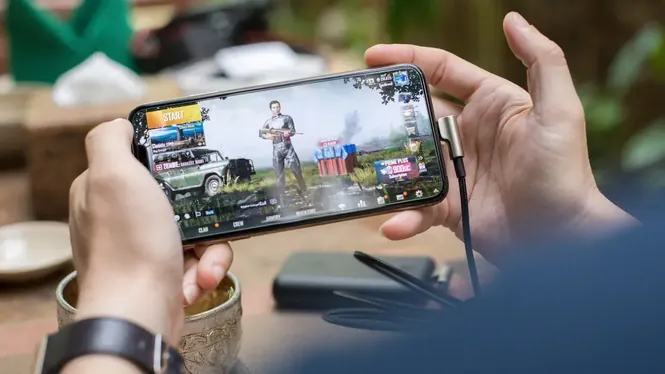

Two settings confuse players more than any others: texture quality and anti-aliasing. One decides how detailed surfaces look up close; the other decides how smooth edges appear. Both cost performance, but in different ways and for different visual rewards.
This guide separates the two, explains what your eyes actually gain from each, and shows how to set them sensibly alongside ZenHub GFX on different classes of phone. The the ZenHub GFX homepage page carries the download package and full app details.
What Textures Actually Are
A texture is the image wrapped over a game surface: the bricks on a wall, the fabric on a jacket, the writing on a sign. Texture quality sets how detailed those images are.
Low textures look soft or muddy up close but are cheap to store and load. High textures look crisp in screenshots and close-ups, and cost memory and loading time.
Engines stream textures at different distances, so a setting that looks identical in a room may differ hugely across a field. Judge texture quality at your game's typical engagement distance, not at a wall you pressed your face against.
Stand still and look at a character's jacket: that is textures. Now strafe past a fence: that is aliasing. The two tests take ten seconds and teach more than a page of definitions.
Where Texture Quality Shows
Textures matter most in slow moments: inspecting a room, reading signs, or admiring a character's outfit. In fast combat, motion hides most texture detail from your eyes.
This is why competitive players often accept medium textures without feeling any loss during play, while explorers and screenshot fans value high textures more.
Character outfits and weapon skins are the marketing face of texture quality, which is why menus display them under it. In actual matches you see them briefly; spend accordingly.
If storage is tight, texture packs are the negotiable download; engines usually run acceptably on the base pack they shipped with.
Texture Cost: Memory and Loading
Unlike resolution, which costs GPU work every frame, textures mainly cost memory and loading time. On phones with limited RAM, high textures can cause pop-in as the game swaps assets.
If you see surfaces arriving blurry and sharpening late, that is texture streaming under memory pressure, and lowering texture quality is the direct cure.
Some games tie texture quality to download size, fetching high-resolution packs separately. On limited storage, declining the high pack is a legitimate performance and space decision, not a downgrade to be ashamed of.
Foliage-heavy games shimmer most, so nature scenes are the honest showroom for any AA decision.
What Anti-Aliasing Does
Aliasing is the stair-step edge where a diagonal line meets the screen's pixel grid. Anti-aliasing smooths those edges by blending edge pixels.
The result is a calmer, more stable image, especially on fences, wires, rooftops, and distant geometry that otherwise shimmers as you move.
Anti-aliasing interacts with resolution as a seesaw: raise one and the other can fall. Players who find their image slightly soft but calm have usually balanced the pair well, whether or not they know the terms.
A slightly softer image that never distracts beats a razor image that sparkles at every edge; distraction is the true cost metric. ZenHub GFX Visual Customization and Game Display Guide explains this side of the topic in full.
The Cost of Anti-Aliasing
Anti-aliasing methods examine and blend edges, which costs GPU time every frame. Stronger methods cost more and can soften the whole image slightly.
On a small phone screen, aliasing is less visible than on a monitor, so the benefit per cost is lower. Many players find AA the easiest quality setting to reduce.
Shimmering is most visible on thin repeated geometry: fences, railings, power lines, and foliage edges. If those elements dominate your favourite maps, AA deserves a higher budget than this guide's default suggests.
When a game updates its engine, retest this pair quickly; rendering changes love to move these two goalposts.
AA Types in Simple Terms
Basic methods smooth edges in the final image cheaply, while advanced methods work at higher internal precision for cleaner results at higher cost.
You do not need to memorise names. The practical rule is to try the lightest method first and only climb if shimmering edges genuinely distract you in motion.
Screenshot communities will always push you higher than play requires. Remember the difference between settings for an audience and settings for your own eyes at speed.
Do not let a screenshot mode bully your play settings: photo modes often raise quality temporarily by design, which proves nothing about matches.
Textures vs Resolution: Which First?
If the whole image looks soft, resolution is the cause; if only surfaces look plain up close, textures are. Raising the wrong one wastes performance.
For most players the priority order is: comfortable resolution first, medium textures second, anti-aliasing last. That order buys the most visible quality for the least cost.
If a game offers texture filtering options alongside quality, sharper filtering at angles often buys more perceived clarity than a whole quality tier, at a fraction of the memory cost. It is the connoisseur's cheap upgrade.
On OLED screens, fine texture detail in dark scenes can vanish into true blacks; a small brightness lift restores it cheaper than a texture tier.
Settings for Low-End Phones
On a budget phone, choose low-to-medium textures to protect memory, and turn anti-aliasing off or to its lightest option.
Spend the saved budget on frame stability. A smooth game with plain surfaces plays far better than a detailed game that stutters through every fight.
Colour banding in skies and smoke is a different artefact, caused by limited colour depth, and neither textures nor AA will cure it. Knowing what a setting cannot fix saves hours of futile adjustment.
If you play docked to a television, retest both settings there; the big screen cross-examines every pixel. Readers can find the full breakdown in ZenHub GFX Graphics Settings Explained for Beginners.
Settings for Mid-Range and Flagship Phones
Capable phones can run high textures comfortably, and texture quality is often a better spend than maximum resolution because it has little per-frame cost.
Add anti-aliasing at a moderate level if edges shimmer in your main games. On high-density screens, even the light method usually looks clean.
On very high-density phone screens, many players literally cannot see aliasing at arm's length. In that happy case, AA is a donation to no one: turn it down and spend the power on frames.
These are the settings to lend to friends' advice, since eyes differ honestly here; borrow opinions about them more freely than about frame rates.
Judging in Motion, Not Screenshots
Pause menus and screenshots exaggerate both settings. Textures look worse and aliasing looks harsher in still images than in moving play.
Judge changes during real movement in your busiest game mode. If you cannot see a difference while playing, the cheaper setting is the correct one for you.
Revisit these two settings last whenever you retune a game. They are garnish settings: valuable, visible, and entirely dependent on the foundation of resolution and frame rate being right first.
Once set, they should disappear from your thoughts for months at a time. That disappearance is the review that matters.
A Balanced Starting Point
Begin with medium textures and light anti-aliasing alongside your established resolution and frame rate. Play for a session, then adjust only the one that visibly bothers you.
Most players land within one step of that starting point permanently, which makes it a reliable default for every new game you install.
That ordering discipline is worth more than any individual value in this guide, and it transfers unchanged to every future phone and game you will ever tune.
Garnish, judged in motion, on a stable foundation: the whole doctrine in one line.
Conclusion
Textures sell detail you mostly notice when standing still; anti-aliasing sells calm edges you mostly notice on thin geometry. Neither is free, and on phone-sized screens both are easier to overbuy than resolution or frame stability.
Set them after your performance foundation is stable, judge them in motion rather than screenshots, and let your own eyes, not a settings list, make the final call for each game. Readers can find the full breakdown in ZenHub GFX Graphics Settings Explained for Beginners and ZenHub GFX Visual Customization and Game Display Guide.